Dear Pickwickian people!
It is our hope and desire to use this blog as (among other things) a place where the seeds of ideas are planted alongside a little know-how. In other words, we are going to document how we do some of our print projects, both big and small, and put them up here in case any of you worthy souls might find them useful or inspiring, or in case you want to add any ideas of your own to the mix.
First, since Monday is Valentine's Day, yours truly has been puttering around with linocutting for the first time in a while. What is linocutting? Taking a plastic or rubbery surface (linoleum blocks or some of the newer, easier-to-cut materials like Speedball's "Speedy Cut" printing blocks) and cutting away at the surface, leaving an image to be printed.
While this produces similar marks to woodblock printing, the medium is much softer and easier to carve, so the effect differs somewhat, and the carving process is often much quicker and friendlier (especially for beginners or folks just starting to re-enter the block printing world).
Any of the images below can be clicked upon to see a larger version, for your detailed viewing pleasure.
First, it can be helpful to develop a simple design. Valentine's Day provides an easy inspiration! I sketched a couple of designs out in pencil, then picked one to work more on. This little guy is the result. Then I scanned the piece from my sketchbook page, and printed it at a larger size to suit the 4" x 6" block I was going to work with. If you are not computer savvy, don't have a scanner, etc., you can simply go to your local copyshop or library and use their photocopier to enlarge the original to the desired size.
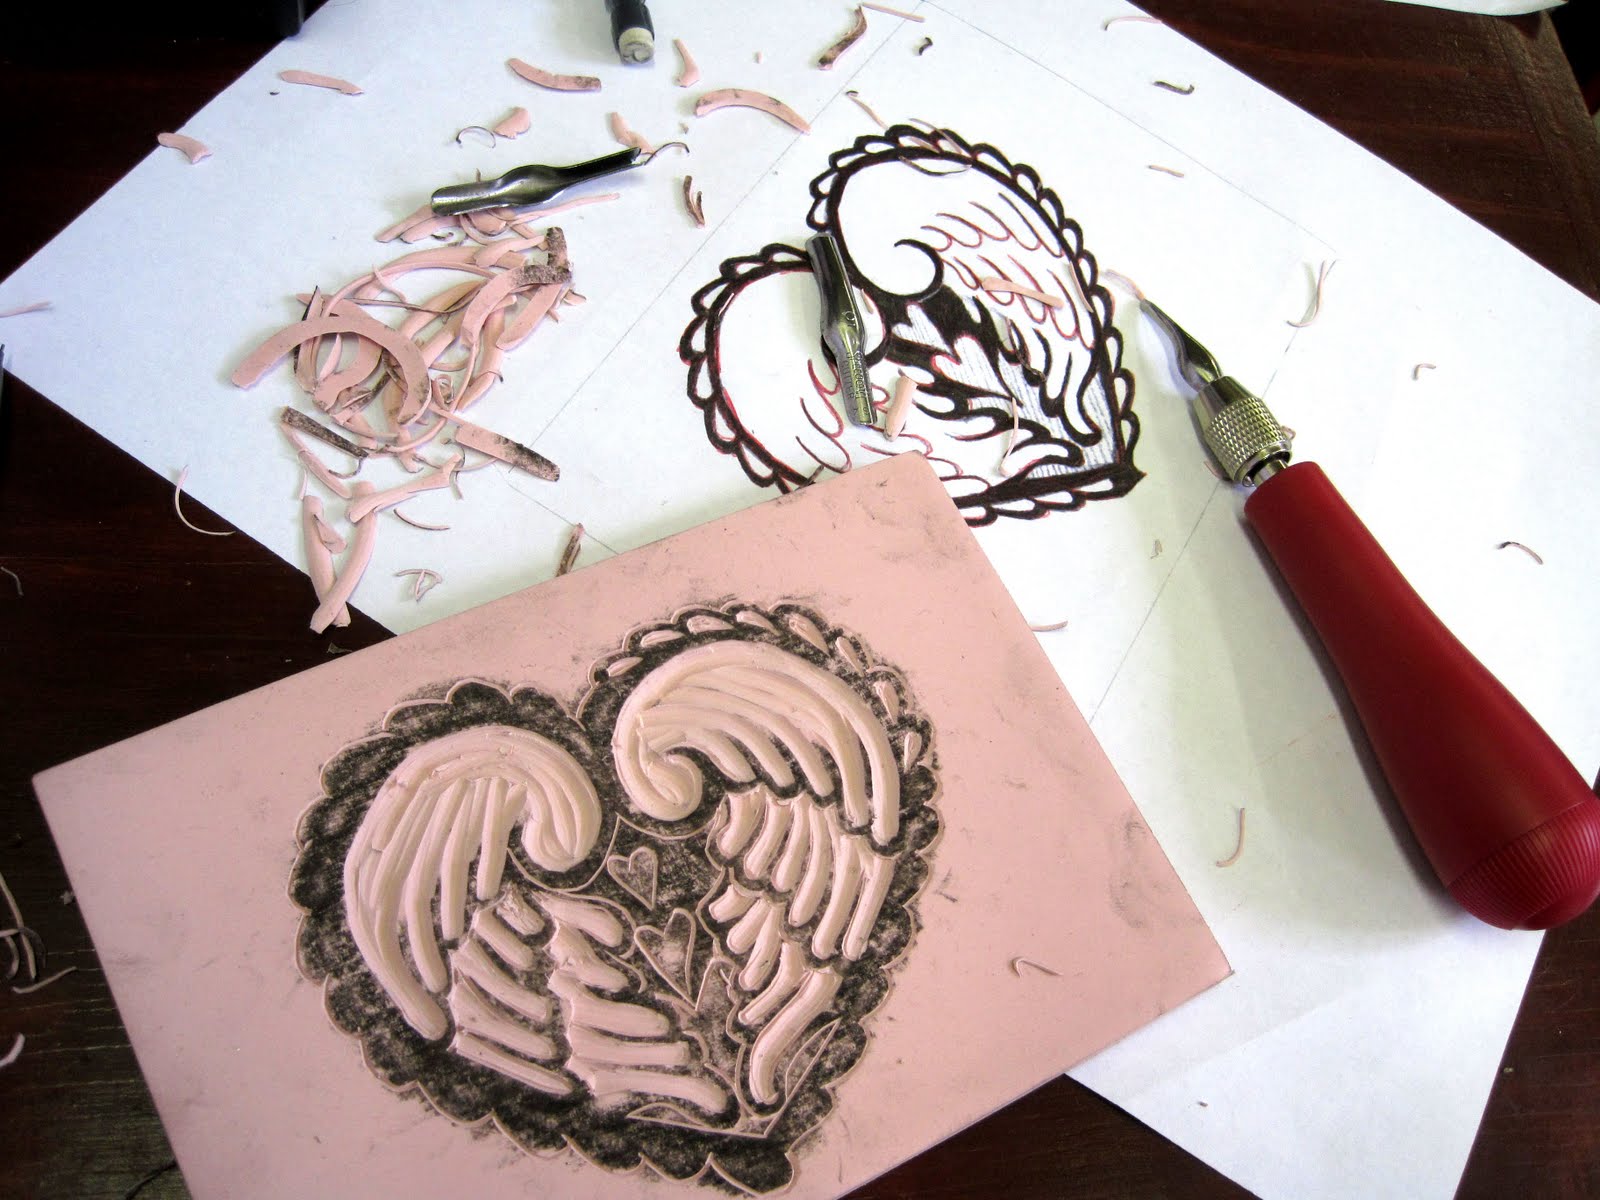
Next, I turned to the back side of the printed version and over the design area I coated the paper with charcoal powder using a soft 4B charcoal pencil. Then I set the sheet over the carving block, and went over the design in ballpoint pen. This resulted in the charcoal powder being pressed into the surface of the block, reproducing the design. This process can be a little messy, and not foolproof, but in a pinch it does the trick.
Here you can see that after doing the tracing procedure, I laid clear tape over the design so the charcoal powder didn't get all over everything else while I used the design on the other side for reference while carving. Another thing I find helpful is to use a different color of ink to do the tracing in, which lets me see what areas I haven't traced over yet.
The other benefit of using the charcoal tracing method is that as you cut into the block, you can clearly see how the surface will look when inked. Each piece of the block you cut away leaves a white area on the design.
I discovered that my set of linocutting tools is stashed in some odd place that was not handy at a moment's notice, so I popped over to Art Mart and picked up a little starter kit. These usually come with a handle and a selection of a few interchangeable blade types, and run about $12-$15. A really well-stocked art supply store will have a bunch of the single blades that you can buy to customize your kit, but in a pinch these sets work quite well.
I started out by using the tiny v-pointed cutter tip, which has a very fine line cut and turns quite smoothly, to outline the areas I would use one of the wider gouge blades to clear out later. This is helpful if you are trying to create clean outlines/edges, because if you are carving carefully, you will find this slim gutter of cut serves not unlike a firebreak, stopping your blade's stroke before it inflicts its tiny but deadly wrath on the part of the design you want to keep whole!
The tiny v-pointed cutter tip can be used to clear out small areas, but for larger areas it's best to move into the land of the larger gouges, either v-shaped for tight areas, or the rounded gouge for wider areas without detail.

Once you've addressed the interior details of the image, you can take gouge in hand to divest yourself of the block that surrounds the image. This is an opportunity for experimentation -- do you really want to get rid of the entire surrounding block? Do you want to carve out a frame for your design? Do you want to leave it with an expressive surround with clearly visible marks that identify it as a blockprint? This part of the process is not unlike the opposite of that decisive moment when you add cream and sugar to your cup of tea. You can always add more later, but once it's in there, it's not coming back out!!! Similarly, you can take your time removing the material around your design, testing different approaches, but there's no going backwards once you've cleared it away.

With that in mind, we are going to try leaving a bit around the Valentine design just to see how it looks. The next step will be to ink it, and run a proof print. This will show us what it will look like as is, and unless we are the most perfect block carvers in the world, it will show us areas that need to be cleaned up or otherwise improved.
Check back next week to see how it turns out!